
Important Note: This article is intended for self-service accounts and accounts for which Template Access is enabled. If you need support in creating or customizing templates, please contact Customer Success.
When preparing candidate résumés for clients, different recruitment firms have different requirements. Some firms want a full reformat, where the résumé is completely redesigned for consistency.
Others prefer the Preserve Original option, which keeps the candidate’s own formatting and layout but adds your company’s branding to the header and footer, cover sheets, or terms sheets, and allows you to redact sensitive details.

In short, Preserve Original lets you combine your branded materials with the candidate’s original résumé — creating a professional, client-ready document without changing the candidate’s formatting and document layout.

Because this process merges two separate documents (yours and the candidate’s), it is important to follow some setup steps to ensure the final document looks clean and consistent.
How to Build a Preserve Original Template
Step 1: Start with a fresh document
-
Open a new blank Word document.
-
Do not add logos, text, or formatting yet — starting fresh avoids conflicts when documents are merged.
Step 2: Adjust header and footer position
-
Double-click into the top margin to open the Header area.
-
In the Header & Footer Tools, go to Position > Header from Top.
-
Set the value to “0” so your header sits correctly at the top of the page.

- Do the same for the "Footer from Bottom" field.
Step 3: Adding Headers and Footers
Do not use the “Different First Page” header option. This can create problems when documents are merged.
If you need unique content on the first page:
-
Insert it directly into the body of the document using a text box (not inside the header).
-
Add your image or text inside the box.
-
Lock the anchor and select Fix position on page to keep it stable.

For footers that should not repeat on later pages:
-
Place a white shape over the unwanted footer starting on page two.
-
Remove any borders from the shape.
-
Set the shape position to Fix position with page.
Step 4: Keep logos centered
Logos can shift when merged with candidate documents due to different margins. To keep your logo centered:
Option 1: Header Alignment (For Logos, No Text)
-
Place the logo inside a text box in the header.
-
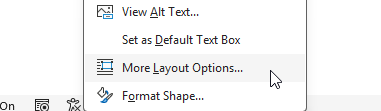
Right-click → More Layout Options.
-
Under Horizontal alignment, choose Centered relative to Page.

Option 2: Using a Table Cell
-
Insert a single-cell table.
-
Open Table Properties and center the cell.

-
Insert your logo or text inside the cell.
Step 5: Adjust Header and Footer Height
-
Use Word’s ruler to set header and footer height, which determines where the candidate's resume will start and end on the page.

-
Do not add extra spacing in the original document, as this will create issues when merging.
Step 6: Use the Tag cshf (If No Cover Sheet)
-
Insert the tag
cshfif your template does not include a cover sheet. -
This prevents extra blank pages or formatting errors.
Step 7: Adding Cover Sheets
A cover sheet can be included on the first page of your template to provide key information.

Cover Sheet fields use the same tags as Full Reformat templates. Some tags will automatically pull details from the candidate’s résumé (for example, candidate name or position title), while others create fields where you can enter your own information.
You will find the full list of cover sheet tags here.