
A workflow in Nexus lets you chain together a series of actions — such as filtering candidates, generating an AI summary, and emailing the results — so that recruitment tasks which normally take several manual steps can be run in a single click, as many times as you need. Once a workflow is saved, you can trigger it on demand from chat for any candidates you select.
Flows are included within the Nexus product.
This article covers how to build a workflow from blocks, save it, and run it on your candidates.
This article assumes you already have a job in Nexus with candidates saved to it. For the initial steps, see Getting Started with Allsorter Nexus.
How to Run a Saved Workflow on Candidates
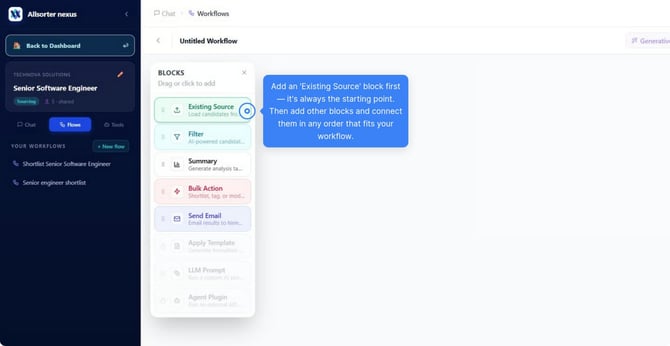
Understanding Workflow Blocks
A workflow is built from blocks connected together in sequence. Each block performs one action. These are the main blocks available for you to build flows:
-
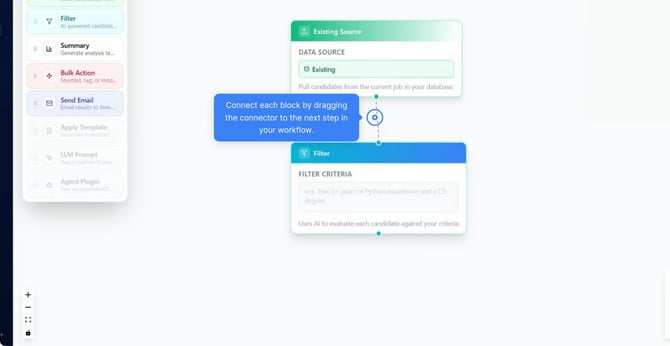
Existing Source — loads candidates from the current job in your database. This is always the starting point of a workflow; every workflow must begin with an Existing Source block. This will pull candidates you manually uploaded to the job as well as any sourced candidates (through NexusSourcing) that you then saved to the job.
-
Filter — uses AI to evaluate each candidate against criteria you describe in plain language, for example "Has 3+ years of Python experience and a Computer Science degree."
-
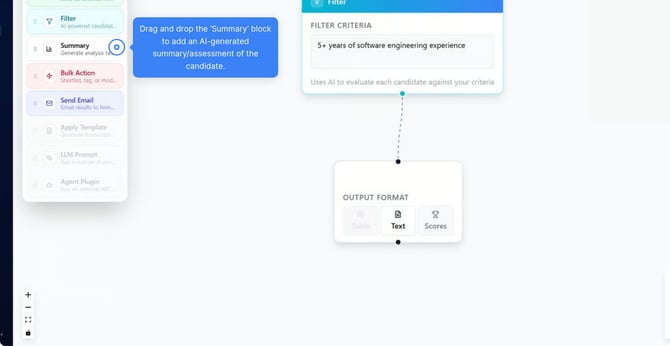
Summary — generates an AI analysis or assessment of each candidate. You can choose the output format: Table, Text, or Scores.
-
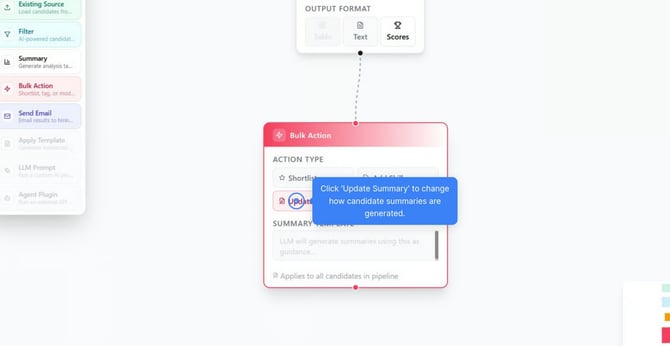
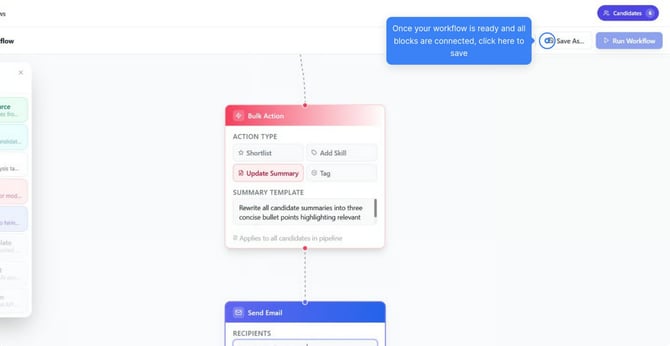
Bulk Action — applies an action to every candidate in the pipeline at once. The available action types are Shortlist, Add Skill, Update Summary, and Tag. With Update Summary selected, you can guide how summaries are generated by entering your own instructions in the Summary Template field — for example, asking it to rewrite all candidate summaries into three concise bullet points highlighting relevant experience.
-
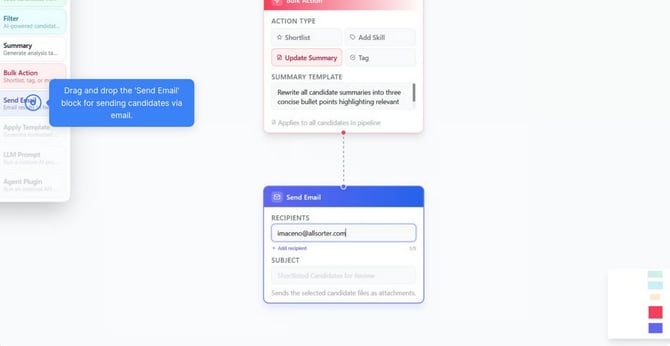
Send Email — sends the selected candidates' resume/CV files as email attachments, so you do not need to download and attach them manually. You can add up to 5 recipients. You can email specific hiring managers directly through the flow.
How to Build a Workflow
-
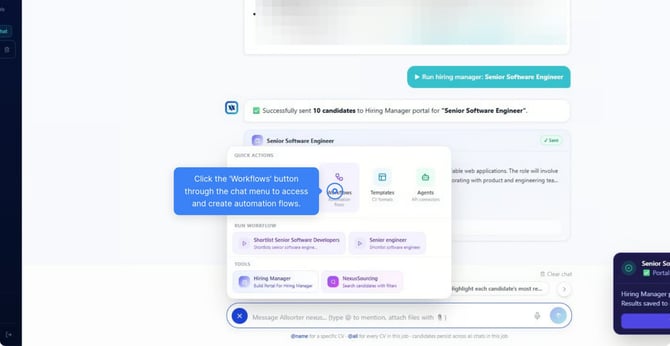
Within the Nexus chat, select the + button next to the message box to open the quick actions menu.
-
Select Workflows to open the Workflows screen.
-
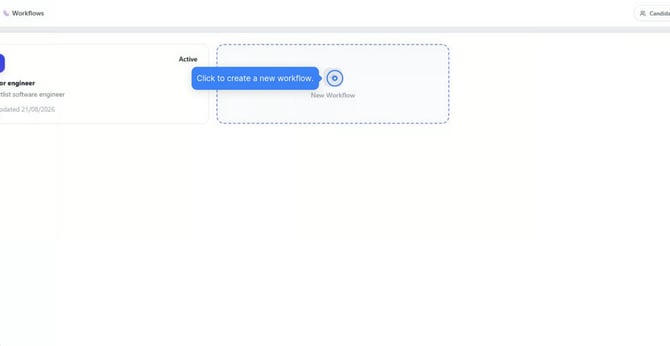
The Workflows screen lists any workflows you have already saved. Select New Workflow to create one.
-
Add an Existing Source block first — it is always the starting point of a workflow. After that, you can add further blocks and connect them in any order that fits what you want the workflow to do.
-
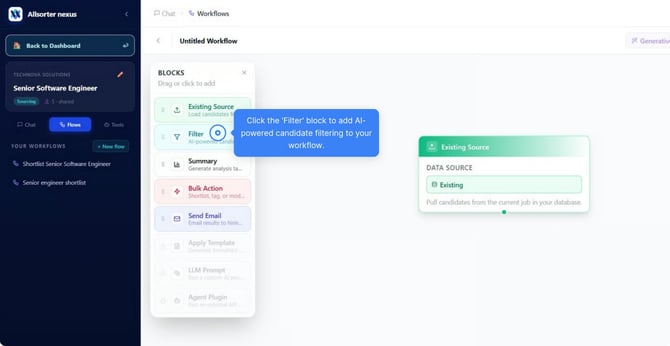
Select Filter to add AI-powered candidate filtering to your workflow, then enter your filter criteria in plain language.
-
Connect each block to the next by dragging from the connector dot at the bottom of one block to the top of the next.
-
Add a Summary block to generate an AI summary or assessment of each candidate, and choose an output format. You can choose:
-
Text
-
Scores
-
-
Add a Bulk Action block if you want to apply an action to every candidate in the pipeline. For example, if you choose Update Summary and add a custom instruction in the Summary Template field to guide the AI on how to rewrite each candidate's summary, this action will be applied to all the candidates connected to that chat.
-
Add a Send Email block to send the resulting candidates and their resumes/CVs to an email address as attachments. You can submit them to a hiring manager directly through a flow by using this block.
- Once your workflow is complete and every block is connected, select Save As in the top right of the workflow builder.
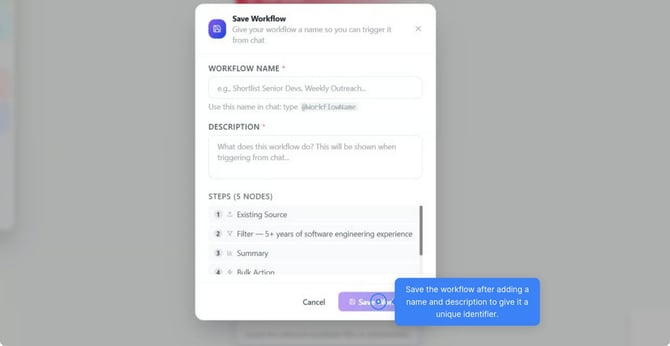
- In the Save Workflow window, give your workflow a clear Workflow Name and a Description. The description is shown when triggering the workflow from chat, so it is worth briefly explaining what the workflow does.
- Select Save Workflow.
How to Run a Saved Workflow on Candidates
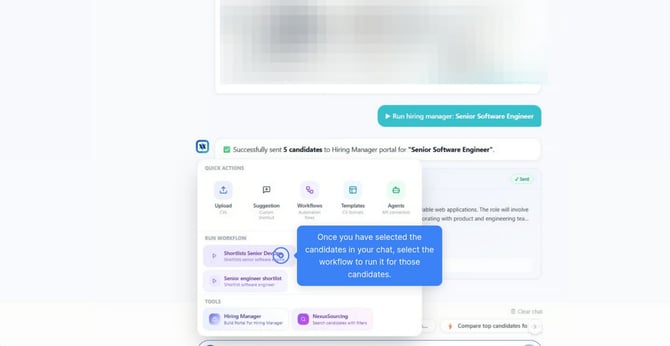
- In the Nexus chat, first select the candidates you want the workflow to act on.
- Select the + button, then select Workflows. Under Run Workflow, select the saved workflow you want to run.
- A panel opens showing how many steps the workflow will run and confirming it is ready to run. You can optionally override some of the workflow's own settings for this run, without changing the saved workflow itself:
- Send Results To — override the email address the results are sent to.
- Email Subject — override the email subject line.
- Existing source candidates — the candidates from the current job that the workflow will run on, filterable by status (All, New, Shortlisted, Interviewing, Rejected). Use the checkbox next to each candidate to include or exclude them from this run. For each candidate, you can also choose which file is sent — their original uploaded CV, or a reformatted version, where one exists.
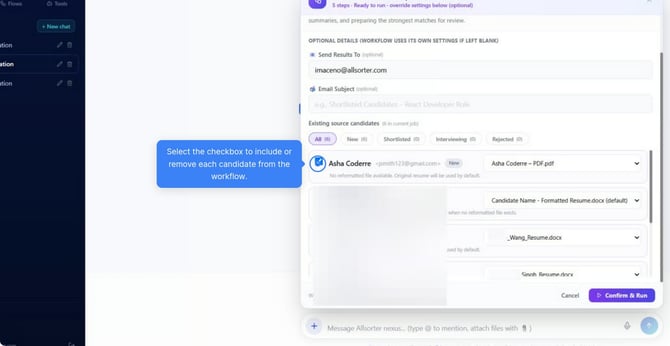
- Select Confirm & Run. This runs every step of the workflow, in order, on the candidates you selected.
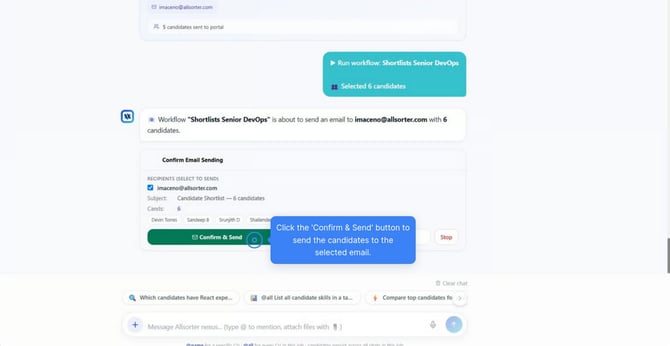
- Before the email is actually sent, Nexus shows a final Confirm Email Sending check, listing the recipient(s), subject, and the candidates included. Select Confirm & Send to send the email.
-
The Stop option stops the workflow run. Skip Email completes the other workflow steps but does not send the email.
A saved workflow stays available to run again at any time — select it from the Run Workflow list under the Workflows quick action whenever you want to repeat the same steps on a new set of candidates.
Frequently Asked Questions
Do I have to add blocks in a fixed order?
No. The only fixed rule is that a workflow must start with an Existing Source block. After that, you can add and connect blocks in whatever order fits your workflow.
Can I change who a workflow's results are sent to without editing the saved workflow?
Yes. When you run a saved workflow, the Send Results To and Email Subject fields let you override those details for that run only, without changing the workflow's own saved settings.
Can I run a workflow on only some of my candidates?
Yes. When you run a saved workflow, use the checkbox next to each candidate in the Existing source candidates list to include or exclude them from that run.
Can I edit a workflow after saving it?
Yes, you can always edit a workflow after saving it the first time. Make sure to save it after making the edits so the latest version is available to be used.
Does creating and running a flow use credits?
Creating a Flow does not use credits. There is a nominal credit consumption for each flow run. For details on how credits are used and current pricing, see allsorter.com/nexus/pricing.